熊猫 Xiongmao is Panda in Chinese. I have adopted the persona of a “Panda Dad” as I balance out the “Tiger Mum” in our parenting Yin and Yang life model – a model shaped by our own temperaments and characteristics rather than any conscious effort to shape our parenting and coaching style.
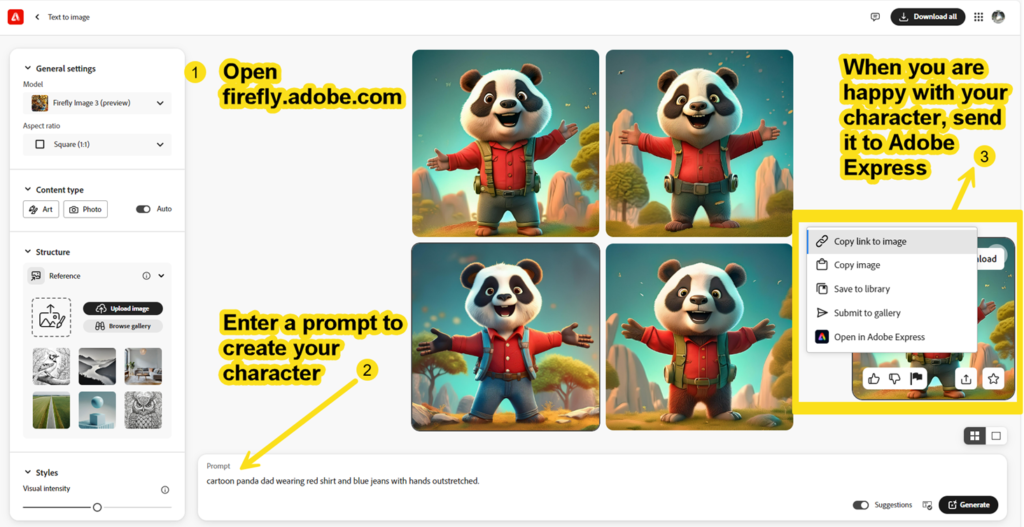
I can’t draw or animate, but after watching a video by Dave Werner who showed how to use Adobe’s generative AI tool Firefly to create a text generated image of a character that could then be transformed via Photoshop into a puppet character that can be animated in Character Animator… quickly, I was inspired to try and create my own Panda Dad puppet for use in Character Animator.
To get a basic concept from Firefly to a talking moving puppet in Animator takes about 30 minutes to an hour… and then you have that puppet for any messaging going forward. It could be a support character for the newsletter, showcasing school or student work, introducing and sharing messages on any topic from an event to a safety message. Different students could be the “puppet master” scripting, animating, voice recording for a performance piece that might only be 30 seconds a week – think infomercial…
Adobe Express, free for our students has a super tool called animate from audio animate characters that automates puppet movements to an uploaded voice, providing over 100 puppets and backgrounds for you to quickly create your animated message. As a starting point for students and teachers creating animation, I would use that. When you decide that your character needs some personal branding (and like me, you might not be allowed out in public with drawing pencils and coloured crayons), then Firefly is the answer to create that character, both guilt and copyright free for use in your productions.
As you can see I am using words here, but in the two following examples, I use my Panda Dad character created from Firefly and Geronimo the sloth from Adobe Express to create a short message. In both cases, I have imported the animated video into Adobe Express so I can add labels, words and explanatory pictures to match the script of my character.
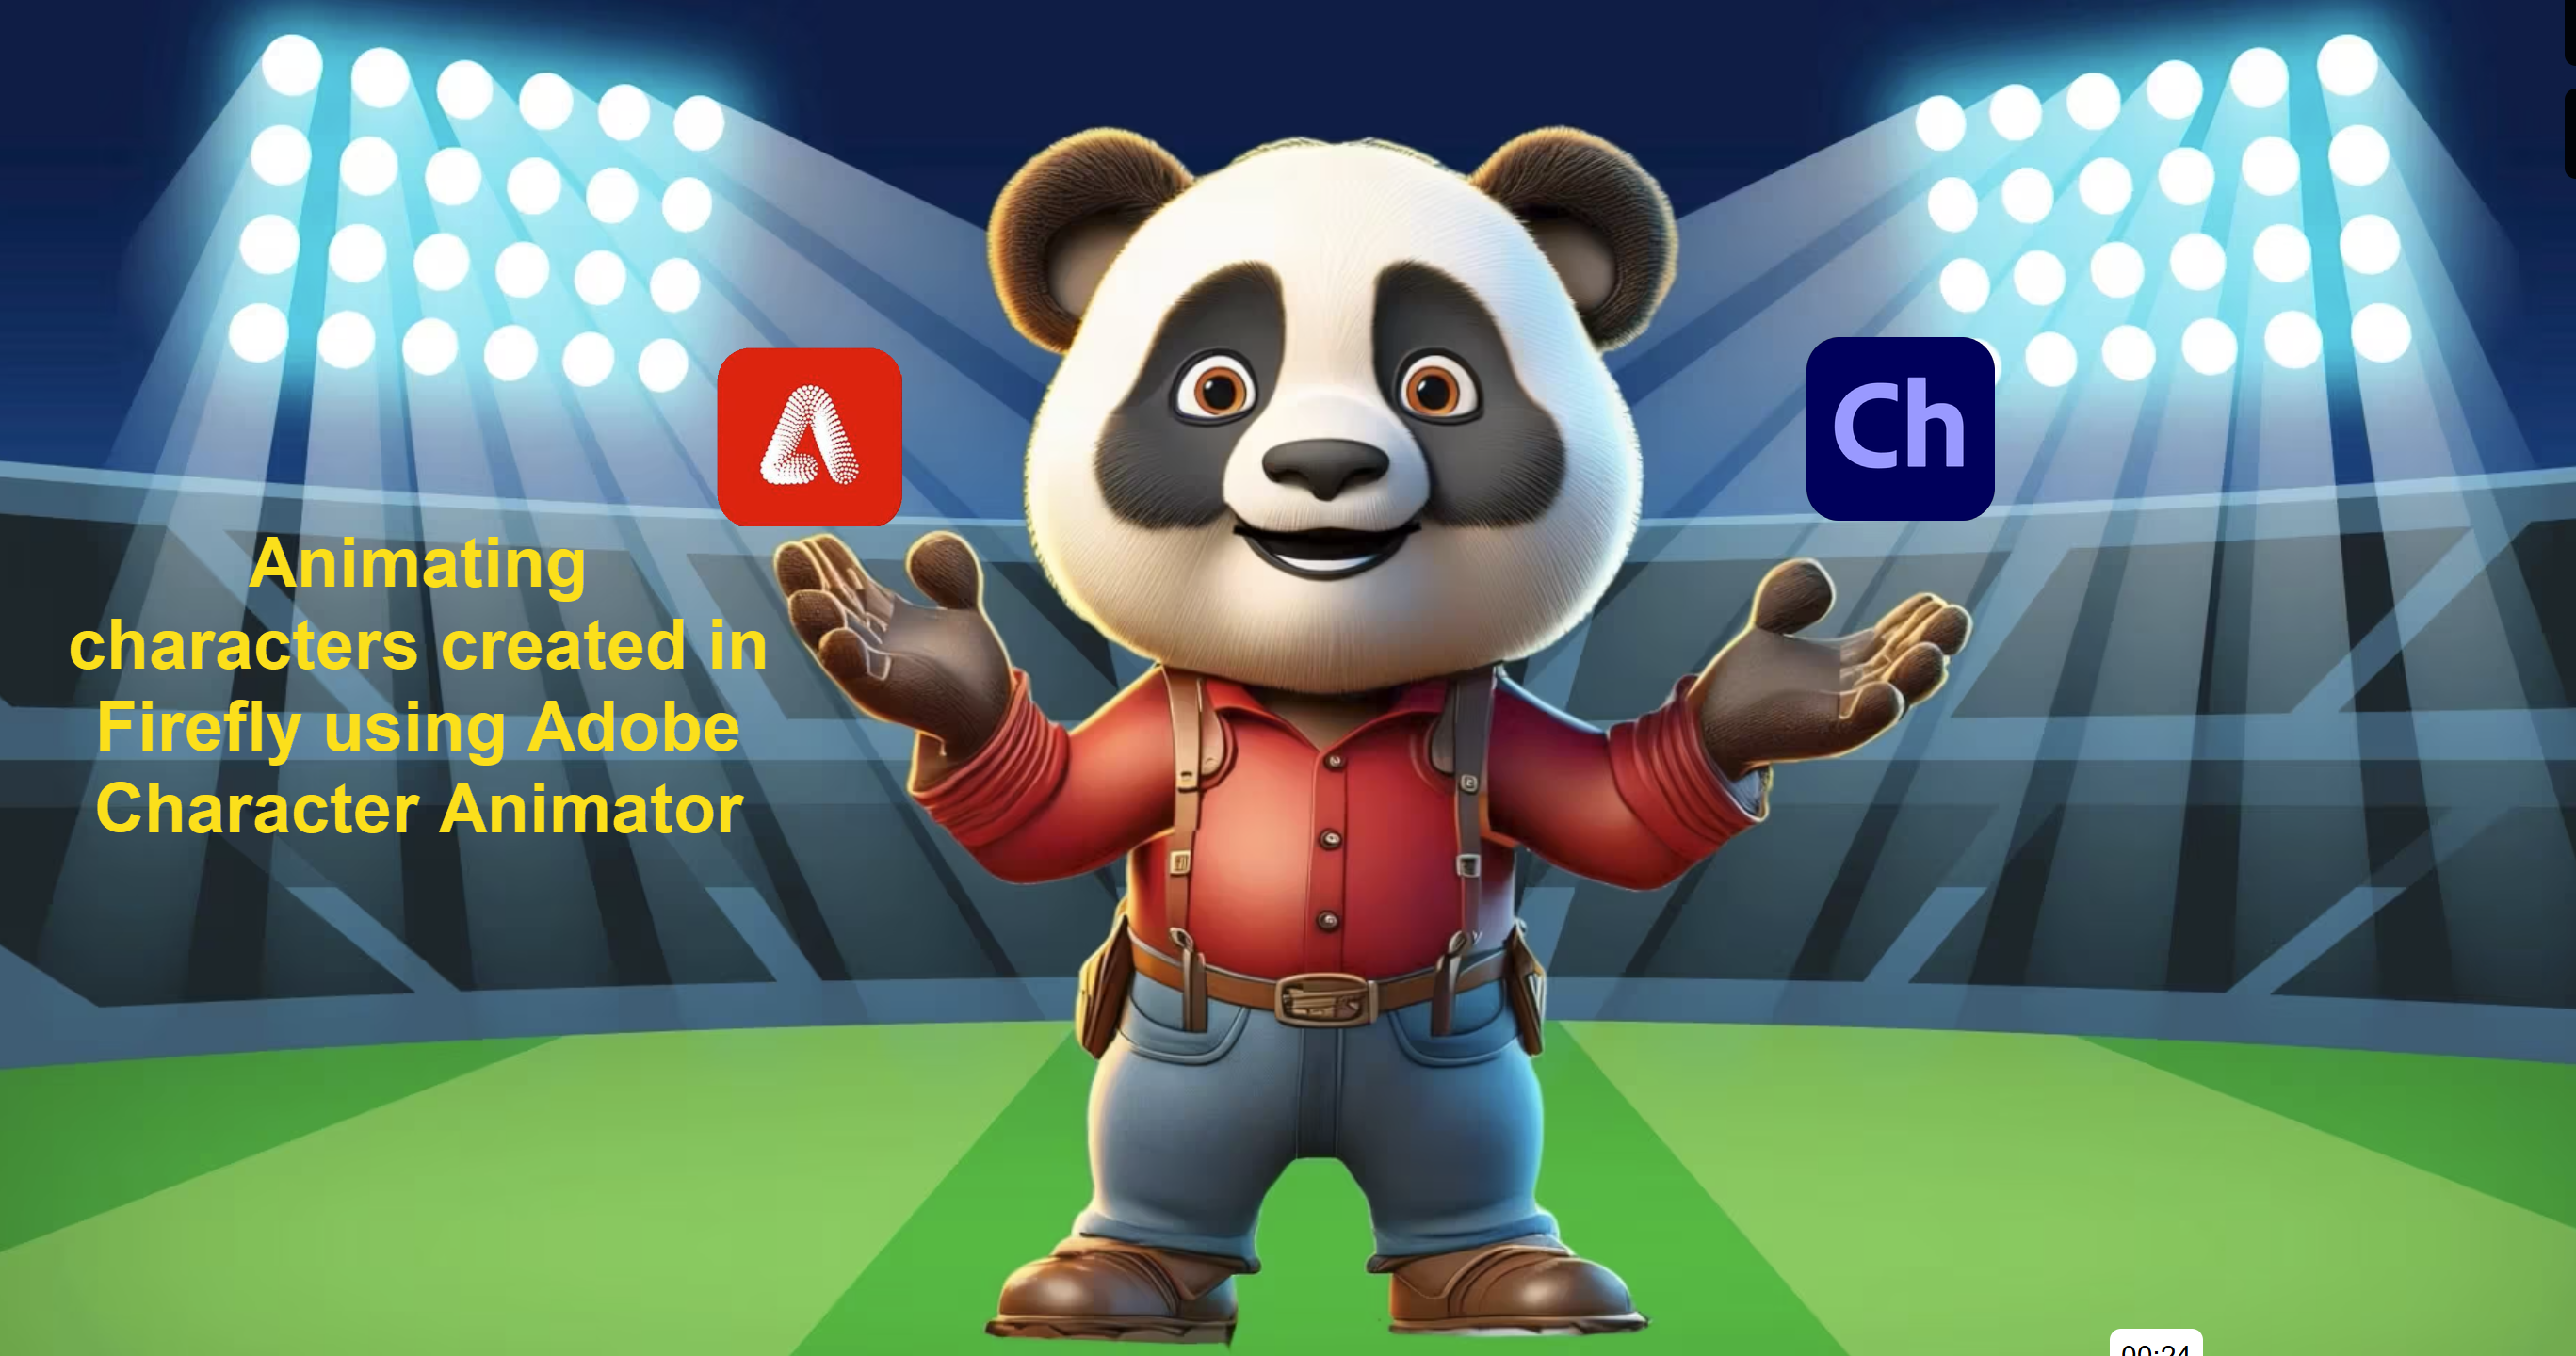
In the example below, I used my Panda Dad puppet I created initially in Firefly and then edited in Photoshop to record a promotional message about… learning how to do just that. I used a stock background from Character Animator and after exporting my video message by Panda Dad, I uploaded it into Adobe Express and added labels and a guinea pig from Adobe Stock to which I added some additional animation and staggered the timing of those elements so they appeared when Panda Dad was talking about them.
This next video was created by using animate from audio where I recorded my voice in a carpark near my work using the Adobe Express app available on iPhone and was able to continue back at my desktop computer on the same file, uploading some images into the presentation before downloading as an mp4 video.
While my performance in both cases may not win an oscar, they were created and uploaded into Vimeo within 10-15 minutes including recording, adding images and timing, downloading the final video and then uploading into Vimeo. That’s not bad in my books.
So if you don’t have a creative cloud license, don’t sweat – Use animate from audio in the free Adobe Express and go from there. You can even create a free Vimeo account to upload your productions if you don’t want pesky ads before your character speaks…
Although I haven’t tried this yet, taking a photo of a soft toy and performing the same process in Photoshop will yield the same result, so watch out for an animated A. Owl coming to a screen near you.
I wrote this post back in July and since that time my Panda has run away… It will be shared once I find it… Found it!!!
Creating Panda Dad
Workshop with videos and screenshots… and a free puppet. From Firefly AI to Photoshop and Character Animator
Ingredients
- 1 Active Creative Cloud License with Photoshop and Character Animator installed
- An active account to that Creative Cloud License (where to order – ntschools environment only)
- Internet access to https://firefly.adobe.com
- Optional – use my cartoon panda image to follow along
- Download the talking mouth .psd file
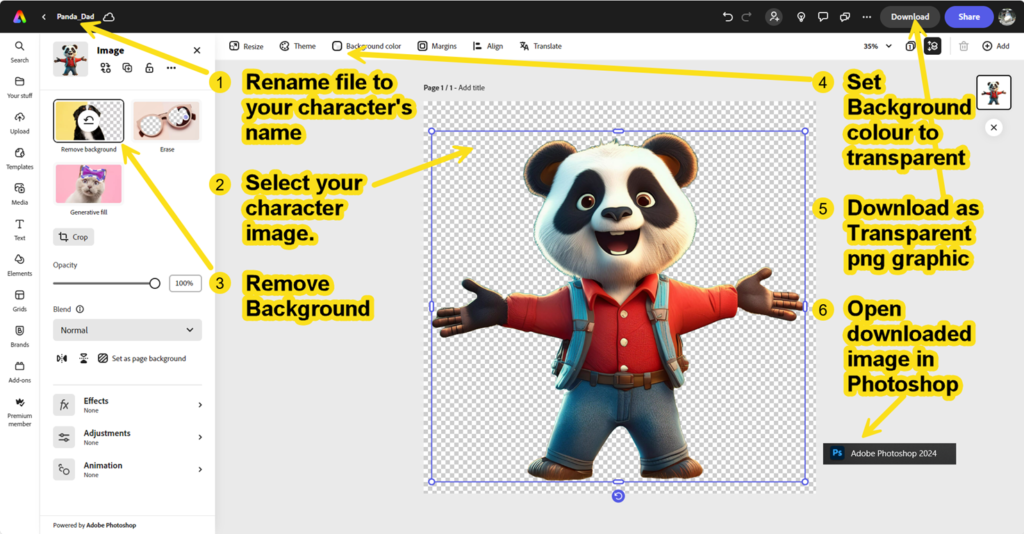
- Optional – access Adobe Express to do the initial background removal
- Camera and microphone on your computer to bring your puppet to life
Step 1 – Start with Firefly – Create character

Step 2 – Adobe Express – Remove Background

Step 3 “Off with his head!” and other dissections…
We want to make the arms, head, eyes and mouth move.
Making Animated Characters with AI Art (Adobe Character Animator Tutorial) – YouTube (35 minute video from the master – Dave Werner)
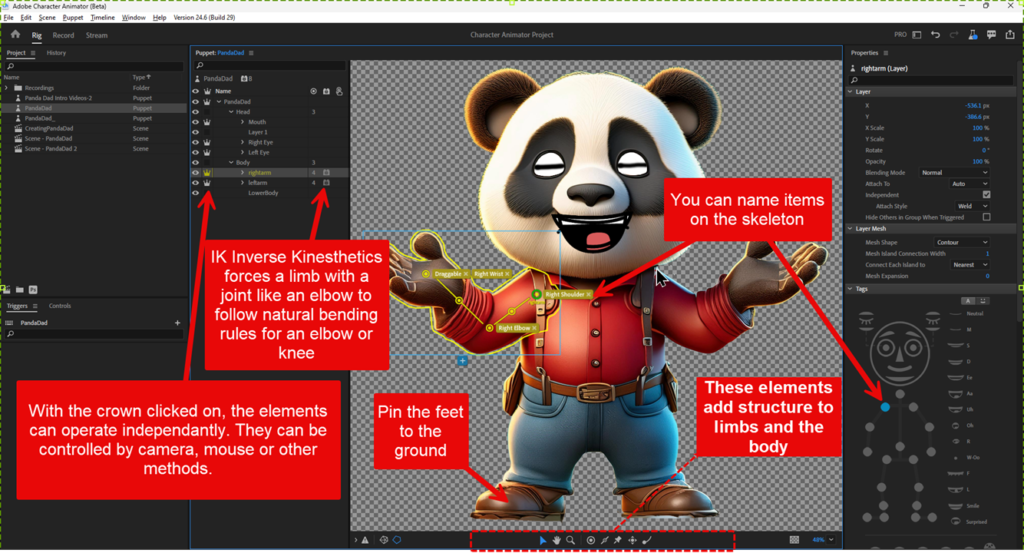
Character Animator needs to interpret layers from Photoshop as parts of the body… This is the magic part

Save your png character file as a PSD
Cut off the head using the polygon lasso tool to select – Ctrl-X the Ctrl-Shift-V to paste in place on new layer
Let’s extract just the mouth2.psd from the downloaded zip file. Worth looking at the
pdf in the zip file find out about mouth
shapes
Open that mouth2.psd file
Puppet creation in Photoshop

Assets
- Photoshop file with editing completed – PandaDad.psd
- Character Animator puppet- PandaDad.puppet
- png cartoon panda image
- talking mouth .psd file
Rigging your puppet in Character Animator

Don’t forget Animate from Audio (Now called Animate Characters)
If this was all too much… Animate charactters is much easier and all teachers and students have access to this… actually it is free for everybody.
You can access it through https://express.adobe.com

